Showing posts with label DIY. Show all posts

Monday, 14 January 2019

Mixed Media Art- BELIEVE in yourself

Hello friends

We have made a mixed media layout. It is the first time we are trying our hands at mixed media art. We thoroughly enjoyed making it. Our new year resolution this time is to learn new things and try them. As we tried mixed media for the first time, we are sticking to our resolution and that feels great.


You too can try making this layout.

Materials required-
Cardboard for base
Black gesso
Stencil from Craftangles
Craftangles-Art wax-Iridescent blue
Glimmer paste
Pistachio shells
Hot glue gun
Fevicryl Acrylic colors-Pearl pink
Chippies from Expressions Craft
Punched flowers and hearts
Magazine cut-out
Foam tape-double sided

Procedure
1. Apply black gesso all over the base. Let it dry.
2. Take a magazine cut out of a lady, stick it on the base. Using hot glue gun, stick the pista shells to form the gown for the lady.


3. Paint the shells (gown) with color of your choice.
4. Using glimmer paste, create pattern randomly on the base through the stencil.
5. Paint the chippies with black gesso, after it dries completely, apply some art wax to highlight. Place it on the base with foam tape.
6. Place the punch cuts with foam tape to add dimensions.
7. Add the sentiment, and you are done.


We are linking this to challenges:
1. CrafTangles Challenge for the month - January

2. TTC#7-Something Old,Something New, Something Borrowed/Gifted and Something Blue

Old- cardboard, pistachio shells
New- Chippies were recently bought
Borrowed- The quote is from Pinterest
Blue- Art wax is blue
3.  Expressions craft Challenge #8 - Mood board- used chippies from Expressions craft.
We were inspired by the glitters and colors, mixed media is new to us.

4. Challenge#1 - Anything Goes

5. Morgan's Artworld Open Challenge #01 - 1st January
6. SS-Recycle Something
7. STAMPlorations Mixed Media Challenge

8. Work It Wednesday December 2018: Try Something NEW! - Trying Mixed media for the first time!

Hope you are inspired by this.
Thanks for stopping by, we value your feedback.
Subhashini & Chandhini

Saturday, 5 January 2019

Ethnic fridge magnets

Hello friends

We are back with our first post for this year.
We have made Ethnic fridge magnets using chippies.


Materials used-
Little birdie elephant chippies
 Fevicryl acrylic paints
Fevicryl gold outliner
Paint brushes
Magnets
Varnish


Procedure
Paint the chippies using acrylic paints of your choice. Let it dry. Give a second coat of paint.
After it dries, using gold outliner, draw desired pattern.
Let it dry, give a coat of varnish.
Attach magnet at the back of chippies.
Ta da.. Ethnic fridge magnets are ready. Aren't these magnets easy, you can convert these painted chippies into key chains too. 

We are linking it the challenges:

Hope you like it.
Thanks for stopping by.
Subhashini & Chandhini

Tuesday, 18 December 2018

Nativity scene-DIY

Hello friends

We are back with a recycled project based on Christmas. So we came up with a tutorial on making a Nativity scene as Christmas is approaching, what could be more appropriate.


Christmas-Nativity scene


Nativity Scene

Materials used-
Christmas bell -2 (2.5 inch long)
Fevicryl Shilpkar clay-1 
Fevicryl acrylic paints
Fevicol
Aluminium foil
Ice-cream sticks
Glue gun
Old Cardboard


Process

Mix the two parts of the Shilpkar clay to form a even colored clay.
 Take 2 big parts from the clay mixture for making shawl, 2 small parts for head, 2 small parts for hands and keep the remaining aside.
With the big part, make flat circle with old cardboard roll just like you make chapathis. This will form the shawl.
Take some aluminum foil and crush it to form round shape for the head, cover the foil ball with Shilpkar clay. Repeat the same process to get 2 big heads and 1 small head for baby Jesus.


Make hands for Joseph and Mary, stick with help of fevicol or glue gun for sturdiness. Cut an old pen refill into 3 inch length, this will form the stick for Joseph. Place the stick in his right hand.
With remaining clay, roll them into long thin rolls to form hair.
Now assemble the head, hair, hands and shawl and stick with fevicol.
Moving to baby Jesus, make shawl just like you did above. Take the remaining clay and make cylindrical shape for the body, stick the head to body and then cover with shawl. 
With some cardboard and ice-cream sticks, make  a shed.
Take some jute cord, wrap it around the ice-cream stick box (as shown in the pic) to form the barn where the baby is placed.
Let them dry.


Baby Jesus, ain't it cute!!!


Now paint everything white with acrylic paint. Let it dry.
Now paint with colors of your choice.
Add a star on top of shed.


Close up of Nativity scene


Give them a coat of varnish if you desire.
Ta da.... our Nativity scene is done.
Hope you like it. 
Do give it a try and let us know how it turned out.
Thanks for stopping by.
Subhashini & Chandhini

Friday, 2 November 2018

Earthern lamp Makeover

Hi everyone

Diwali is around the corner and I hope you have prepared your home for the festivity. Here is what we have made for Diwali, it can be used as show piece to pep up the glamour quotient of your home.


Peacock diya

Elephant diya


We have given old earthern lamps (diyas) a makeover as after years of lighting them, it turns black and can no more be used. This way we are not throwing them and giving them a new life. 

We have use Fevicryl Hobby Ideas Shilpkar Clay to give the desired shape.

Check out this envelopes that are easy to make and can be used to give money to your family and friends.
Handmade Envelopes

Check out this rangoli we made two years back. There is also a tutorial for it.
Kundan stones Rangoli

We have a tutorial, so do give it a try.

Materials Required:
Old earthern lamps (diyas)
Fevicryl Hobby Ideas Shilpkar Clay
Fevicryl Hobby Ideas Pearl colours
Golden spray paint
Golden outliner

Method:
Cleaning the lamps-
Soak old earthern lamps (diyas) in detergent water for some time. With old tooth brush, rub it well so that soot goes away. Dry well.
Mix the two parts of clay well that they are blended well.

For elephant diya-

 Now take some talcum powder in your hands and start making a small ball, elongate it to form a cylindrical shape with narrow end at one side. This will form the head of the elephant. Make 4 small cylinders of approx 1 cm length for the legs.
Now make 2 small balls and flatten them to form the ears for the elephant. 
Make a small tail, You can use fabric glue to stick them to earthern lamp. Let it dry.
Give it a coat of white acrylic paint.
Paint using colors of your choice. 
We have sprayed it with gold spray paint.


For peacock diya-
Make 8 small balls and shape them like flower petals.(This is for the feathers.) 
Now using scale or paper cutter, make lines for the feathers. 
Take some clay and shape it like long log at one end and flat and wide petal like shape at other end. This will form the neck and body of the peacock.
Now stick the body of the peacock toward the pointed end of diya using fabric glue.
Stick the feathers as shown in the picture.
Let it dry, first give it a coat of white acrylic paint  and then paint them using pearl paints.
After it dries, using gold liner, draw over the lines of feather.
If you wish, you may give it a coat of varnish. It also gives it a shine.


 Earthern lamp makeover


We are linking it to the following challenges:

1. CWAA Challenge 45
2. A Bit More Time To Craft Challenge #79
3. A Perfect Time To Craft November Challenge # 11
4. Altered Eclectics
5. CGE Anything Goes Challenge #57
6. Crafty Animals Challenge 20
7. Morgan's Artworld Open Challenge #11
8. LTCCB #28
9. MIUCB #19
10. NJC October Challenge
11. Sunny Day crafting Challenge
12. Crafty Creations Challenge #377
13. Creative moments Challenge 155
14. The Crafty Addicts Challenge 53
15. TTCRD Challenge
16. Creative fingers Challenge 154
17. CraftyCatz challenge #436
18. LPOCF CHALLENGE #92
19. FFC #258
20. Crafting from the heart Challenge 226
21. 613 Avenue Challenge # 214 Anything Goes
22. Happy craft challenge
23. Prika Blog Challenge-October-2018: “Anything Goes-Gold & Glitter”


Hope you like. Do give it a try.
Subhashini & Chandhini


Thursday, 25 October 2018

BE-YOU-tiful- DIY Recycled Doll


Hello everyone

We are back with a new post and this we have one more doll to share with you. We wanted to make a sister doll for the previous doll we had posted earlier. You can check it here


These both dolls symbolizes us. Don't you think they resemble us? 


This time theme at "The Twisted Challenges"  is  Fairy Tales + Add your Own Twist.  You all might be familiar with the story of Snow White, where a wicked woman is jealous of Snow white's beauty. She asks the mirror every morning, "Magic mirror on the wall, who is the fairest one of all?" The wicked woman used to compare herself with others' beauty and so was unhappy. So.never compare yourself with others. Comparison is the thief of joy. Beauty begins the moment you decide to be yourself.


We have a tutorial for making these dolls.
Materials Required:
Old sauce bottle
Fevicryl shilpkar clay
Fevicryl acrylic paints
Paint brushes
Foam flower (optional)
Fevicryl fabric glue
Black wool
Black OHP marker

Method
Start by cleaning sauce bottle. Wipe it dry.
Mix the two parts of clay well that they are blended well.
 Now take some talcum powder in your hands and start making a round ball for the face and a small cylinder for the doll's neck.. Leave some clay for hands.
Now take the remaining clay and roll it into a circle. Poke a small hole in the centre. 
Now carefully take the round clay and place it over the bottle also form it into a cape as seen in the doll.
Then place the small cylinder shaped clay with help of fabric glue on top of bottle and place the big round clay for the head.
With the remaining clay, divide it into two halves and roll it like a long thin log. Place one end of the log  under the cape and other end joining each other as if both hands are touching each other.


Let it dry completely. This will take half hour to an hour.
Now give a coat of white paint. Let it dry and give one more coat.
After it dries, give a coat of color of your choice. We have painted it red for the gown and golden for cape. Paint flesh tint color on face and hands. 
After it dries, make hair using black wool. You can try any hairstyle you wish. Now with black marker, draw eyes and lips. 
Place a foam flower if you wish.
Ta da, doll is ready.


We are linking it to the following challenges:

1. TTC#5: Fairy Tales + Add your Own Twist


2. TTCRD Anything Goes Challenge

3. Crafters Cstle Challenge #10

4. Morgan's Artworld Open Challenge #10

5. Altered eclectics October challenge

6. FFC #256 Always Anything Goes

7. CraftsGalore Encore October Anything Goes Challenge #56

8. MIUCB #18 - Anything Goes

9. LPOCF CHALLENGE #92
Hope you like it.
Your comments are highly appreciated.
Chandhini & Subhashini

Friday, 12 October 2018

Festive Wall Hanging- DIY Elephant Toran (Navratri series -2)

Hello everyone

Happy Navratri to all my Indian friends.
We are back with one more creation, this time it is a wall decor idea, especially suited for festivals.

With festivals round the corner, we made a toran to give our home a festive look.
We have recycled pizza boxes as a base for this wall hanging, you can use any cardboard. Those who are a regular here might be knowing our love for recycled crafts and handmade goods. So, this is a win-win for us as it incorporates our two loves.


Toran in making


Materials Required:
Cardboard/ Pizza box
Colored sheets
Rhine stones/Kundan stones
Pearls
Golden ball chain
3D outliner-gold (we used Fevicryl Hobby Ideas)
3D Golden glitter tube (Fevicryl Hobby Ideas)
Golden ribbon
Glue

Method:
1. Draw an outline for elephant on the cardboard, you may make birds or anything you wish to. Make for such outlines.
2. Likewise draw the outline on colored sheets that we will use to cover the cardboard base. Cut them out.
3 Paste the colored cut-outs of elephant on the cardboard cut-outs with glue.
4. With the help of 3D outliner, outline the elephant. Let it dry completely.


5. Now comes the fun part, you can let your imagination go wild and embellish the wall hanging in any design you like. We made a design the elephant back with 3D glitter.
6. Now stick the stones, pearls and ball chain the way you like.
7. Stick the completed pieces on ribbon, leaving some ribbon on top to hang it on wall.
Ta-da it is ready.


We are linking it to the following challenges:

1. Crafting from the heart challenge

2. TTCRD Anything Goes Challenge

3. Creative moments- Challenge 154

4. TIME OUT Challenges Challenge #120

5. Crafting With An Attitude- Challenge 44

6.  HAPPY CRAFT CHALLENGE - OCTOBER

7. Pennys Challenge 401

8.Crafty creations challenge Challenge #376 - Anything Goes

9. Artistic inspirations challenge-208.

10. 613 Avenue Challenge # 214 Anything Goes

11. LTCCB #27 - October Anything Goes

12. MIUCB #18 - Anything Goes + Monochrome

13. Not just cardsoctober-challenge-anything-goes

14.Sunny day crafting sept-15-oct-14-challenge

15. A Bit More Time To Craft Challenge #77 - Anything Goes

16. A Perfect Time To Craft October Challenge # 10

17. Crafty Catz Challenge 433 - Anything Goes

18. Crafts galore challenge October Anything Goes Challenge #56

19. 4 CRAFTY CHICKS - #424

20. Creative fingers Challenge #153

21. Wk 41 ~ Anything Goes Challenge ~ Polkadoodles

22. Creatilicious Challenge # 148 ANYTHING GOES

23. Morgan's Artworld Open Challenge #10

24. Lil patch of crafty friends- CHALLENGE #91

25. Papercraft Business Challenge #11 Oct

26. Lets create Challenge #142 - ANYTHING GOES

27. The crafty addicts Challenge-53

28.PIP Challenge 1840

29. Pearly sparkles Challenge 33 - Anything Goes

Do give it a try, you will love for sure.
Hope you like it.
Subhashini & Chandhini
Related Posts Plugin for WordPress, Blogger...

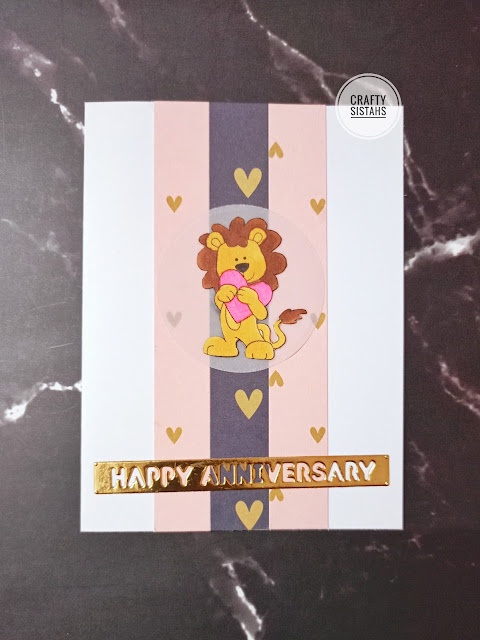
Anniversary card: Ft pattern papers

Hello friend, We used some pattern paper scraps for the background. We had this image colored and cut lying around, so thought of pairing it...