Showing posts with label Recycled. Show all posts

Friday, 5 June 2020

Forest scene in a jar

Hello friends
We are back with a project- this time, it is a recycled creation. Those of you, who know us, might know that we love making recycled crafts.

There was a contest for World Environment Day on Instagram, by Itsy Bitsy, an Indian craft store. It inspired us to make a recycled creation. What we love about this creation is that it is functional!!

We had a old Peanut butter jar (plastic) with us, which we use to store our washi tapes. We thought to give it a crafty makeover.

Ain't it cute?


Here is the tutorial, in case, anyone of you is interested in making a similar one for yourself.

Materials required:
Old plastic jar
White cardstock
Coloring medium of choice
Itsy bitsy Stamp
Craftyscrappers Create-a-scene stencil
Glue/ adhesive
Scissors

Method:
First remove the outer cover of the jar by soaking in in soapy water for an hour. Scrub it and remove the cover. Let it dry.
Stamp image of your choice and color, fussy cut it.
Cut it to the size enough to cover the jar.
Using grass stencil and ink pad, make grass on a piece of white cardstock.


Now make trees and create scene as you like.
Paste the fussy cut images on the background and stick it on the jar.
Ta da, makeover of jar is ready. Flaunt it by by keeping it on your craft desk.

Entering it into the following challenges:
1. TIME OUT- inspired by the HAPPY

2. Krafty chicks challenge
3. Scrapping 4 fun challenge- BABY animals
4. Art impressions stamps.-challenge-284
5. Cute card thursday
6. Word art wednesday
7. Simon says-masculine
8. Leanns-world-101-challenge-27
9. Stamplorations june-challenge- Inspired by the green color in the prompt

10. Stamplorations-stencil-challenge

11. Simon says- Make your own background
12. Pennys challenge
13. Crafty creations challenge
14. Paper funday challenge
15. TTCRD
16. Lemon shortbread challenge
17. Crafty catz
18. Alphabet challenge
19. Cardz tv
20. Morgans art world
21. Mix it up challenge
22. LTCC
23. Cards galore challenge

Hope you like it
Happy crafting.


Chandhini and Subhashini


Tuesday, 23 July 2019

Alien Life

Hello friends
We have something different to share with you.
We have made a scene on an old tape roll. We made galaxy background using ink pad. We spread shimmer paste through stencil. We used alien images from Creative Expressions stamps.


Tutorial:

Materials required:
Old, empty tape roll
White cardstock
Sparkle/ shimmer paste
Stencil
Stamped, colored and fussy cut images
Black acrylic paint
Ink pads and Blending foam- for the background (You may use any coloring medium- watercolor/ acrylic paints to make the background)
Double sided foam tape
Pencil and scissors

Method:
Start by painting the tape roll black using acrylic paint (or any other paint).
Place the tape roll on white card stock, trace the outline using pencil and cut it using scissors.
Now using ink pads and blending foam, do ink blending to make the background. Let it dry.
Place stencil over the ink blended base, apply shimmer paste through the stencil. 
Remove and wash the stencil. Let it dry.
Now using foam tape, place the stamped images on the base and stick it.
Ta-da, your project is ready!

Entering the following challenges: 1.  Camp Create Day 5: Glitzy Glitter


2. SS-Not A Card
3. SS-Make Your Own Background
4. W2CB #67: The Men on the Moon
5. Creative moments
6. Lets create challenge
7. LeAnn's World 101 Challenge #16
8. CrafTangles July 2019 Challenge - Mini Art

9. Pixie's Snippets Playground
10. A Perfect Time To Craft Challenge
11. Prika-"Perfect Smoosh"

12. TTCRD
13. Crafting by designs
14. LPOCF
15. Avenue 613

Thanks for stopping by.
Happy crafting.
Subhashini & Chandhini

Friday, 28 June 2019

Mixed Media Pen Stand

Hello friends

Today we have made a mixed media pen stand.
We incorporated our favorite thing, that is recycling. The base is an old lotion bottle. We added burlap, then wrapped some paper twine around the bottle and held it in place using hot glue gun. We used old color pencils as the focal element. We used Craftangles spray- Denim Blue and Craftangles Art Stones. Added pop of color with acrylic paint. And finished off with a quote.
We were inspired by the "Back to school" theme at Splashy Mix challenge. So we have used color pencils and the qoute is written on black cardstock (resembles blackboard, inspired by mood board).


Entering into the challenges:
1.Splashy mix challenge-6

2. CrafTangles June 2019 Challenge - Anything Goes

3. The happy craft challenge
4. CARDZ TV ANYTHING GOES CHALLENGE #92
5. Crafty catz
6. SS- ATG

Thank you for stopping by.
Happy crafting.
Subhashini & Chandhini

Thursday, 23 May 2019

Sun- catcher with CD

Hello friends,

Here we are back with something different this time, it's a Sun catcher. 


We made it using old CDs, yes you heard it right, using old CDs. We wanted to make them for a long time, finally gave it a try. The main thing here is to clean the CDs, remove the thin reflective film off it and clean it. We used tapes to remove the thin film, but it leaves behind some sticky adhesive which is the most time consuming part of the process.
We were inspired by some images on Pinterest. 
Rest is the fun part, we used Fevicryl 3D Outliner to draw the outlines and colored with glass colors.
Just added some beads onto the embroidery floss, made tassels and tied it... Tada, the Sun catcher is ready to show off and add charm to your balcony.


Linking to the folllowing challenges-

1. FFC #282 AAG
2. 613 Avenue challenge #221 - Anything Goes
3.Get Creative Challenge #80
4. The crafty addicts Challenge 60
5. LPOCF- CHALLENGE #106
6. Crafting from the heart- Challenge 243
7. TTCRD anything goes challenge
8. SS: Bright Colors
9. Crafty Creations Challenge #391 - Anything Goes
10.  Crafts Galore Encore Challenge #63
11. LTCCB #34 - May Anything Goes
12. MIUCB #25 - Anything Goes + Mixed Media
13. Cookie challenge-117- Inspired by the pink flowers


14. Creative moments challenge-169
15.  Let's Craft and Create Challenge #147
16. CrafTangles May 2019 Challenge - Altered Art
17. Morgan's ArtWorld Open Challenge #05
18. The happy craft challenge
19.  Simply Create Too #149
20. Not just cards challenge
21. Ally's Angels Challenge-22

Thanks for stopping by,
Hugs
Chandhini & Subhashini

Thursday, 9 May 2019

Altered Box

Hello friends

We are back with altered  box made with old CDs.
We had old tape rolls lying around and wanted to make box with it for a long time, we finally gave it a makeover. We love recycling. 


We have used Love Actually papers from Papericious to cover the CD. We painted the tape rolls with Chalk paint- Soft rock from Papericious. We wanted to add some interesting element to the box, so added shaker element to the lid.  We used Craftyscrappers Clear card element. We used butterfy and die cuts (that we won in butterfly challenge) to embellish the lid of the box.
This is a great option for those special ladies- mom, sister, bestie...
You can use it to store jewellery, watch, trinklets, etc.


We are happy with the outcome.

Entering into challenges:
1. Papericious April ChallengeAnything Goes with Flowers and/or Butterflies

2. #122 SpinThe Butterfly wheel with F- used french rose, flowers and butterfly

3. CrafTangles May 2019 Challenge

4.Crafting With An Attitude Challenge 51
5. 613 AC-Challenge #221
6. Paper funday Challenge #5
7. Happy craft challenge
8. Morgan's ArtWorld Open Challenge #05
9. SS: Add Something Metallic
10.Allsorts- 518 - Pretty in Pink
11. Virginia's-show-share
12. SS: For A Special Lady
13. Crafty Gals Challenge #191 ~ May Flowers
14. STAMPlorations Things with Wings Blog Hop

15. Fun Friday – Challenge #113
16. Craftyhazelnut's Patterned Paper
17. iNSD Challenge #3

Thanks for stopping by.
Have a great day.
Happy crafting.

Chandhini & Subhashini

Monday, 25 February 2019

Love Birds Pen stand

Hello friends,

We are back with a recycled project- this time a pen stand.


This incorporates our two favorites- quilling and recycling. We have recycled old plastic medicine bottle, cardboard base, tissue rolls and loads of empty pen refills.


Pen stand is essential for all crafters, in fact everyone. Check out this Cute Owl Pen Stand. We often fall short of pen stand to hold our pens, brushes and markers, so thought why not make them our self.


We wrapped corrugulated sheet around one of the tissue roll. For other tissue roll, we cut old pen refills into equal heights as that of the roll, and stuck them around it. For the medicine bottle, we first pasted tissue and after drying gave it a coat of texture paste to give it a tree-like texture.


We made the base by assembling crimpled loose coils. These green strips are also recycled in a way that these were one side for assignment, we then hand cut those sheets into strips.

We are really happy with the outcome!!

Entering into challenges:

1. IQCG#55 -My Passion My Love- passion-quilling, love-recycling
2. TTC#8: Valentine's Day + No Red/ Pink

3. CrafTangles Feb 2019 Challenge- We used Craftangles texture powder

4. MMA-February Challenge

5. Splashy Mix Challenge# 2 - Love Moodboard- We were inspired by the flowers and the word LOVE

6.Simon Says: No Stamps Allowed
7. Unstampabelles #86: Simply Bright and Cheerful
8.  Allsorts- 508 - Spring Flowers
9. Inkspirational Challenge # 181- Use Your Stash
10. Creative Fingers Challenge #158

Hope you like it.
Happy crafting.
Thanks for stopping by.
Subhashini & Chandhini

Friday, 22 February 2019

Craftyscrappers DT Post- Ocean of Love shaker card

Hello friends,

We are here to share our  DT inspiration post for Craftyscrappers!

Check out their new Valentine release, they have four amazing stamp sets which will make the crafter in you go crazy!! We got the Boat Love stamp set as a part of our DT kit.

Here, we go with the project for this month's challenge at the Craftyscrappers. 


PROJECT-1 Ocean of love Shaker card
We have made a shaker card with Boat love stamp, see the cute couple, aww soo cute.. Isn't it? They have clear card element which is just perfect for your card, no need to spend time cutting or trimming as it is pre- cut to the standard A2 card size. Now, that's a bonus.


PROJECT-2 Love birds


 On the inside, we have made quilled birds, you may write short and sweet messages or keep chocolates inside if your box is bigger.
You are done, isn't it a lovely gift for your valentine?


To know how we made them, click here.
Hope you are inspired by our projects.

Don't forget to participate in the ongoing challenge- “All you need is- love”

Craftyscrappers Clear card element
Craftyscrappers Shimmer Paste- Candy
DAZZLE TEXTURE PASTE-SEAGLASS
BURLAP RIBBON TAPE-IVORY

Entering the card in challenges:
1. KCC #443 "Shades of Red and Pinks"
2. Crafting With An Attitude
3. CrafTangles Challenge - Love is in the Air

4. Crafty Gals- Love is in the Air (Add a Heart)
5. Crafty Creations
6. Creative Inspirations - With Love
7. The Paper Funday Challenges
8. Ellibelle's Crafty Wednesday
9.  CuteNCrafty
10. LPOCF- CHALLENGE #100
11. Simply create too- Ch. #146- AG/OPT TWIST USE HEARTS
12. Stamping sensations
13. NJC-February Challenge
14. LTCCB #31
15. MIUCB #22
16. Unicorn Challenge #40 Include a Heart
17. Uniko Challenge #51

18. February "Show & Share"
19. HAPPY CRAFT
20. Morgan's Artworld
21. JOSTTT002- we used glimmer, red & heart

22. 613 AC-Challenge # 218
23. Papercraft Challenge #15
24. Creatalicious Challenge #157
25. A Perfect Time To Craft Challenge for February # 2
26. FFC #270
27. Crafts Galore Encore Challenge #60
28. SHOP BLOG CHALLENGE

Entering the Love birds into
1. IQCG#55 -My Passion My Love- passion- quilling, love-recycling

Happy crafting
Thanks for stopping by
Subhashini & Chandhini

Friday, 21 December 2018

When Life gives you Pistachio shells......

Hello friends

We are back with a recycled project.
We have  made a Christmas tree from Pistachio shells. It is easy to make and looks great.


Linking to the challenges:
1. Allsorts Weel 498 - Christmas Trees
2. CHNC 416
3. Altered eclectics
4. TTCRD Anything Goes Challenge
5. LPOCF CHALLENGE #96
6. MLCCB #5
7. HAPPY CRAFT CHALLENGE
8. Cookie Challenge #109
9. Not just cards- December Challenge

Hope you like it.
Thanks for stopping by.
Subhashini & Chandhini

Tuesday, 18 December 2018

Nativity scene-DIY

Hello friends

We are back with a recycled project based on Christmas. So we came up with a tutorial on making a Nativity scene as Christmas is approaching, what could be more appropriate.


Christmas-Nativity scene


Nativity Scene

Materials used-
Christmas bell -2 (2.5 inch long)
Fevicryl Shilpkar clay-1 
Fevicryl acrylic paints
Fevicol
Aluminium foil
Ice-cream sticks
Glue gun
Old Cardboard


Process

Mix the two parts of the Shilpkar clay to form a even colored clay.
 Take 2 big parts from the clay mixture for making shawl, 2 small parts for head, 2 small parts for hands and keep the remaining aside.
With the big part, make flat circle with old cardboard roll just like you make chapathis. This will form the shawl.
Take some aluminum foil and crush it to form round shape for the head, cover the foil ball with Shilpkar clay. Repeat the same process to get 2 big heads and 1 small head for baby Jesus.


Make hands for Joseph and Mary, stick with help of fevicol or glue gun for sturdiness. Cut an old pen refill into 3 inch length, this will form the stick for Joseph. Place the stick in his right hand.
With remaining clay, roll them into long thin rolls to form hair.
Now assemble the head, hair, hands and shawl and stick with fevicol.
Moving to baby Jesus, make shawl just like you did above. Take the remaining clay and make cylindrical shape for the body, stick the head to body and then cover with shawl. 
With some cardboard and ice-cream sticks, make  a shed.
Take some jute cord, wrap it around the ice-cream stick box (as shown in the pic) to form the barn where the baby is placed.
Let them dry.


Baby Jesus, ain't it cute!!!


Now paint everything white with acrylic paint. Let it dry.
Now paint with colors of your choice.
Add a star on top of shed.


Close up of Nativity scene


Give them a coat of varnish if you desire.
Ta da.... our Nativity scene is done.
Hope you like it. 
Do give it a try and let us know how it turned out.
Thanks for stopping by.
Subhashini & Chandhini
Related Posts Plugin for WordPress, Blogger...

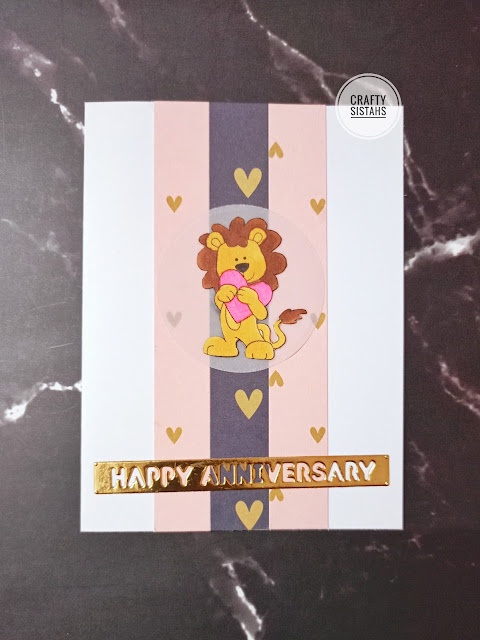
Anniversary card: Ft pattern papers

Hello friend, We used some pattern paper scraps for the background. We had this image colored and cut lying around, so thought of pairing it...