Friday, 2 March 2018

Tealight candle holder using old CDs

Hello friends, 

Here's our tealight candle holder to lighten up your mood. You need not spend a lot on buying those fancy tealight candle holders. just a bit of creativity, craft supplies, patience and you are sure to rock the festive season. You can also make similar ones to enlighten your homes.

Here, i have used glass colors that were lying around sadly in a corner. I have drawn a simple design. You can draw more intricate ones too.


Feel free to decorate the holder as desired. Sky is the limit.

Linking it to linky party-

Inspiration-spotlight-linkup-party-308
Creatively-crafty-link-party-130/

Thanks for stopping by.
Please leave your valuable comments,
Chandhini & Subhashini


Thursday, 1 February 2018

Kokeshi doll- recycled with tutorial


Hello friends,
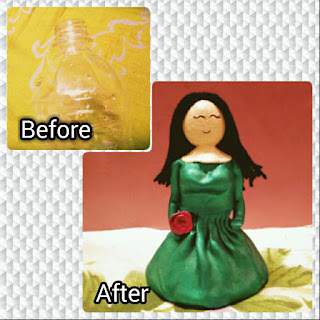
I have always been fascinated by kokeshi dolls and wanted to make something similar. It calls for carved wooden pieces which I could not find nearby. But that did not deter me from my passion for it, so here's my take on kokeshi dolls.
I  have used old medicine bottle bottle as the base for it.


Below is the tutorial for the doll, so that you can also try your hands at making it for yourself. 
Materials required:
Medicine bottle-1
Shilpkar clay-1
Tissue paper (patterned)
Fevicol
Acrylic colors
Paint brushes
Ribbon


Method:
  1. Take an empty medicine bottle. Remove the label and thoroughly clean the adhesive part.
  2. Mix the two parts of the shilpkar clay. Stick a portion of it for the head part using fevicol. Shape the hair too. I have kept it simple.
  3. Allow it to dry completely.
  4. You can paint the clothes. Here, I have use patterned tissue and decoupaged it. It is my first try so it has not come out neatly. 
  5. Then paint the face and hair. Draw the eyes
  6. Cut out a piece of ribbon and stick around the middle so as to resemble the traditional attire- kimono.
  7. Leave it to dry. Your kokeshi doll is ready to be admired.

 We are entering into the below challenge

LTCCB #22 - May Anything Goes


We are linking it up with the Inspiration Spotlight Linkup Party
https://www.dearcreatives.com/inspiration-spotlight-linkup-party-303/

Don't be a silent reader. Leave behind your comments and suggestions.

Hope you like it,
Chandhini and Subhashini

Tuesday, 23 January 2018

Quilled Greeting Card


Hello friends,
This card was made long time back, but somehow we did not post it in our blog. We realised it only recently while going through our gallery. So, we thought of posting it now.


It is a simple quilled card. We have used Malayisian quilled flower and simple tight coils for the heart outline. We have stuck patterned ribbon with polka dots and few half pearls to give it simple yet elegant look. This was made for a close friend of ours.

Thanks for stopping by.
We value your comments and suggestions,
Chandhini & Subhashini

Saturday, 13 January 2018

Beautiful CD Rangoli

Hello friends,

Presenting you rangoli in a new form- CD rangoli done with glass colors. These were done really long ago after 12th board exams with quite a bit of free time and literally nothing to do. So, we made a bunch of these beauties and gifted them to our relatives. It was appreciated by one and all.


The best part about this rangoli is that each one is unique and there are endless possibilities with the decor. You can use sequins, ball chains and even mirrors. Here, I have sticked with glass colors. But I have made others with kundan stones too, which I will update soon.
Hope you will also enjoy it.


We are linking it up with the Inspiration Spotlight Linkup Party
https://www.dearcreatives.com/inspiration-spotlight-linkup-party-306/

Don't be a silent reader. Leave behind your comments and suggestions.

Hope you like it,


Chandhini and Subhashini

Monday, 1 January 2018

Best out of waste: Princess doll with tutorial

Hello everyone

I love making crafts from waste materials. We all buy water bottles while train journey and we end up crushing and throwing them or some of us use it to carry water. Seldom do we think about the waste we are generating. So I thought why not recycle them into something useful. I liked its shape and thought of making a doll using clay and other supplies. Although I made this last year, I gave the final touch only now. I enjoy making this. So, here's my doll for you all to enjoy.

Below is the tutorial for the doll, so that you can also try your hands at making it for yourself. 
Materials required:
Plastic water bottle-1
Shilpkar clay-1
Betel nut- 1
Black wool
Fevicol
Acrylic colors
Paint brushes


Method:
  1. Cut out the top part of the water bottle. 
  2. Mix the two parts of the shilpkar clay. Stick a portion of it for the neck part and place the betel nut at the top for the head.
  3. Shape the clay as desired for the body and dress and paste it using fevicol.
  4. Allow it to dry completely before proceeding with paint.
  5. You can also make the hair using clay but here, I have used wool.
  6. Paint it with colors of your choice. Paint the face and give the details like eyes and lips.
I am sure you will thoroughly enjoy making it.
Don't be a silent reader. Leave behind your comments and suggestions.

Hope you like it,
Chandhini and Subhashini


Wednesday, 27 December 2017

Coconut shell box


Hello friends, 

We are back with a new craft which is inspired from Radhika hobbycarfts, do check  the link for detailed instructions. She has beautifully explained it with pictures.

I really enjoyed making it. I have decorated it in a different way. I am very happy with the outcome. you can use it to store your small rings, earrings, chains and other small stuff. Hope you will also enjoy it.


Don't be a silent reader. Leave behind your comments and suggestions.

Hope you like it,

Chandhini and Subhashini

Friday, 18 August 2017

DIY- Wooden spatula makeover

Hello friends,

Today we have a recycled project. While de-cluttering our home, we found two wooden spatulas sitting in a corner sadly. Very often we find something unexpectedly which inspires us for our next project. Don't you all agree with me? 
So, we thought why not make something with it. We got inspiration from Google for this craft.


Why not hang it in your kitchen to enhance its beauty?

Here's the procedure for you to try:
Wooden spatula -1
Shilpkar clay -1
Acrylic paints
Fabric glue
Paint brushes
Talc

Turning everyday item into insanely cute decor!
Method:
Clean the spatula first with a dry toothbrush or cloth. Give a base coat with black paint & allow it to dry. You can give a second coat. Now mix the two clay together well & dust your palms & working area with talcum powder. Start making the flowers & leaves. Glue them on the spatula using fabric glue. Let it dry completely & paint with colors of your choice.


Thanks for stopping by
Please leave your comments and suggestions.
Love
Chandhini & Subhashini
Related Posts Plugin for WordPress, Blogger...

Anniversary card: Ft pattern papers

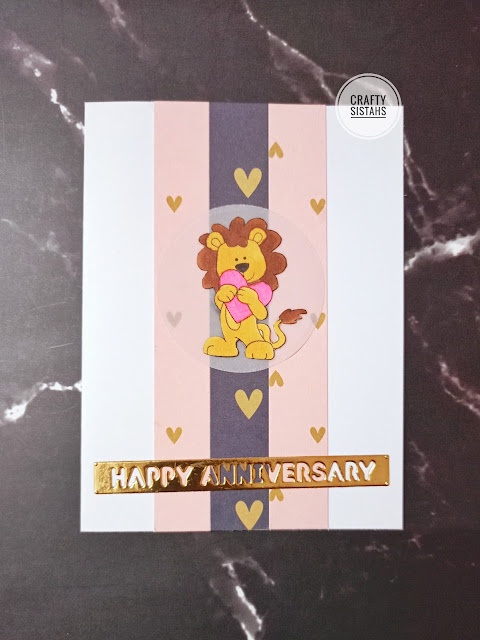
Hello friend, We used some pattern paper scraps for the background. We had this image colored and cut lying around, so thought of pairing it...